Start out with an 8x8 board 1/4 inch thick. I used a MDF board.
1. Paint the board. I wanted a dark color under my white so when it crackled I could see it. You can get the crackle medium at your local home store. I got mine at Home Depot in the paint department. This stuff goes a long ways.
2. Paint the crackle on. Let it dry.
3. Paint your board with your top color. I used Vermont cream (white) from home depot.
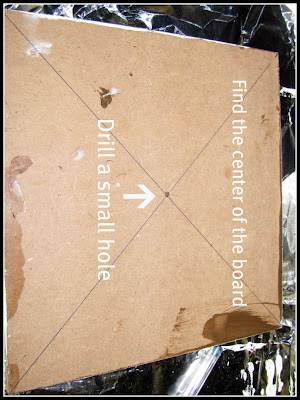
I don't know why this picture is sideways.
4. Turn your board over when the top paint is dry, and mark an X from corner to corner to find your middle spot. My board is an 8x8, but I still wanted an exact measurement.
5. Drill a small hole in the board for a pilot hole.
6. With a larger drill bit, drill a hole from the front to the back. I used a 5/16 drill bit for the clock shaft I am using.
7. Place the vinyl stencil on the board matching up the predrill hole with the vinyl stencil hole.
8. Paint the inside of the vinyl with the paint you used for the under coat. Pull off the stencil up before the paint drys completely. The paint is latex paint, and you don't want the stencil pulling up your design.
9. Now you are ready for the clock parts. Follow in the instructions that come with the clock kit. I got my clock kit from Klockit.com. I used motor 10082 and hands number 66761


1 comment:
I'm relieved to see that the vinyl worked on the crackle. I used latex paints and tried a vinyl stencil- only for it to peel off. Using all acrylics this time and hoping for a better outcome!
Lovin' your blog! :)
Post a Comment